Getting started in Sassie
There are eight steps you will take to complete the process of using Sassie.
They are:
- Step 1: Creating a client and a survey
- Step 2: Adding questions to your survey
- Step 3: Adding locations to your client
- Step 4: Creating a test shop
- Step 5: Scheduling your shops
- Step 6: Assigning your shops
- Step 7: Reviewing your shops
- Step 8: Publishing your shops
Step 1: Creating a client and a survey
The Express Setup option allows you to create a client and a survey in a quick and easy way. You can edit the settings for both after the creation as well.
Log into your Admin account, and get started on the main Admin Page.
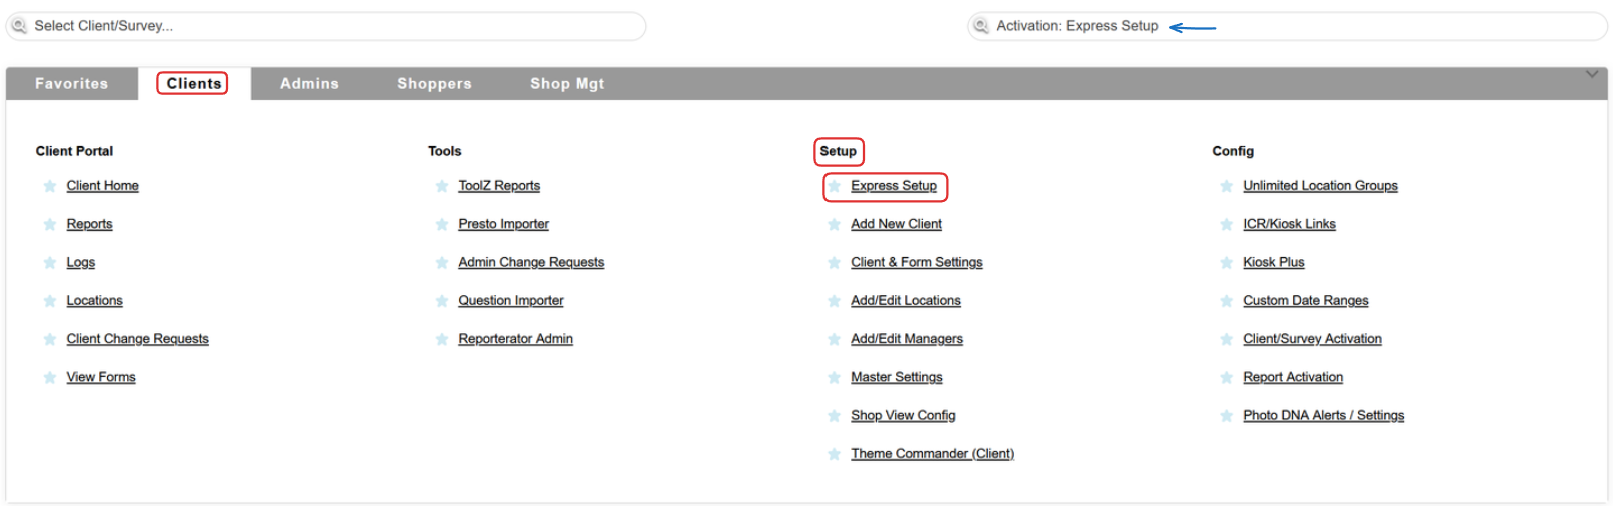
In the Clients tab, you will find an Express Setup link in the Setup column. Or, you can simply use the Quickjump bar and search for Express Setup.
A new page will open, prompting you to input information about your client.
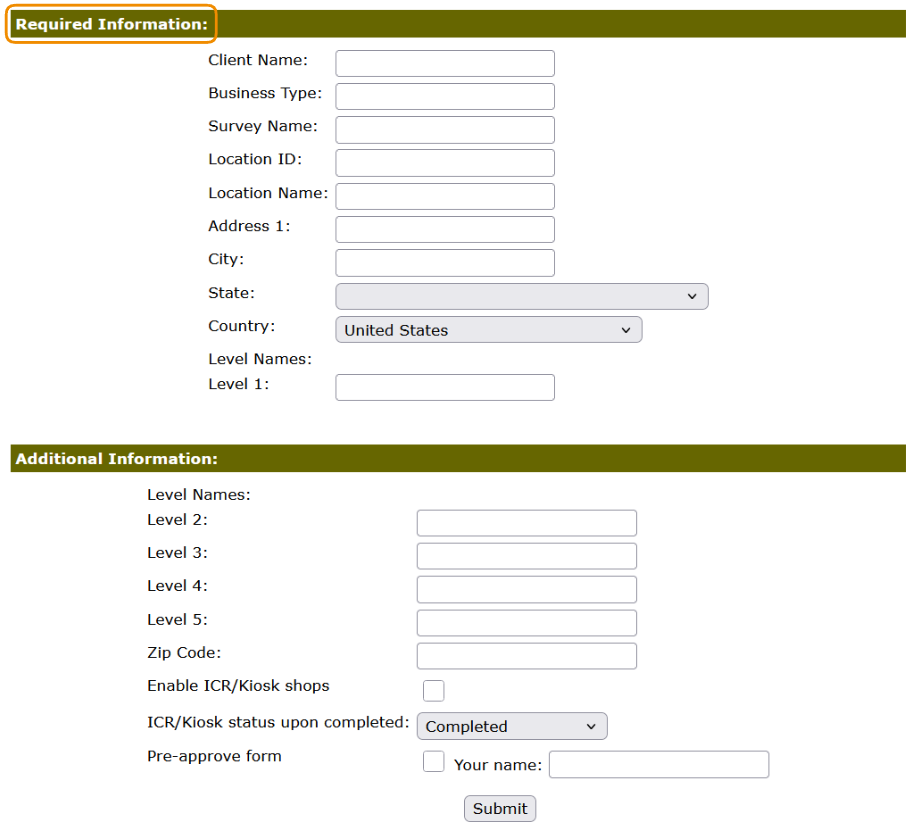
While you can skip the Additional Information section, the Required Information data needs to be filled in. Use the Submit button at the bottom of the page.
The first step of the non-Express version of the process would be to add a new client manually.
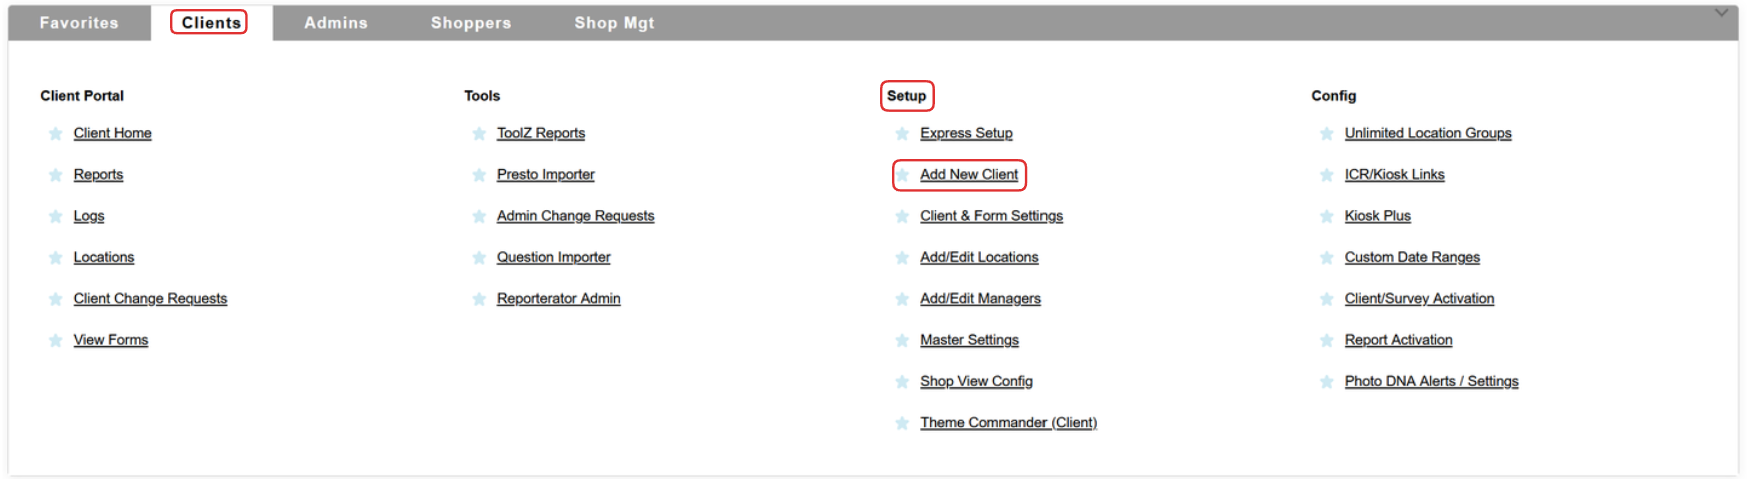
You would also get started on the main Admin Page, but instead of using the Express Setup link, you would use the Add New Client one.

You will want to read more about client settings in a different part of our knowledge base.
Once a client has been created, you will also want to create a survey for that client.
Step 2: Adding questions to your survey
Once a Client and a Survey have been created, you will want to add questions to your survey.
You can either add the questions manually, or you can import them.
Step 3: Adding locations to your client
Quite like with question creation, you can either add the locations manually, or you can easily import them.
Step 4: Creating a test shop
Once you have set up your client and survey and want to see what it looks like as a shopper without assigning it to a test shopper, you can create a test shop.
To do this, head to the Client & Form Settings page, and use the Create Test Shop option from the Form dropdown.

Once you fill in the shop, you can head to the Admin Shop Log and hit the Review button to see how it looks like on the reviewer side as well.
Step 5: Scheduling your shops
Before proceeding with scheduling, you will want to decide how your program will be carried out.
Please refer to the Scheduling Types article for more detailed information!
Step 6: Assigning your shops
Depending on the type of scheduling you decided on, you can find the shoppers manually, let them self-assign, or even have your partner do it all for you.
Step 7: Reviewing your shops
Once the shopper has completed their shop, and it has been submitted, your reviewers want to view the shop, change its status and make changes if necessary.
Shops are available in the Admin Shop Log, and they can be sent back to the shopper, or released to the client once they reach the set distribution status.
Step 8: Publishing your shops
The final step is to configure client report options. You will want to read more about the Chameleon Shop View, as well as the Dragon Dashboard.

If needed, you can always reach the support by opening a Support Tracker. Please make sure to provide as much information as you can, about what you need, and what you would like to achieve.
Additionally, you can always have a look at our training videos!
Source
Migrated from public Freshdesk article 9000272655.
https://help.sassieshop.com/support/solutions/articles/9000272655-getting-started-in-sassie